Qualitative fieldwork methods: auto-photography

 Teaching ideas  Comments Off on Qualitative fieldwork methods: auto-photography
Jan 132014
 

In an interesting recent article, Melanie Lombard of the Global Urban Research Centre of the University of Manchester in the UK describes how she used the fieldwork technique of auto-photography to explore the views of people living in two informal settlements in Xalapa, the state capital of Veracruz.

What is auto-photography?

Auto-photography is not the same as selfies! In auto-photography participants take photographs, choosing images and representations for themselves. Auto-photography typically entails a researcher giving cameras to research subjects and then asking them to photograph particular places and/or events.

Why use auto-photography?

Visual images are of great importance in geography. Geographers have utilized photographs and other images in their research and teaching for decades, paying considerable attention since at least the 1950s to the ways in which people respond to particular images, and how they interpret them. Auto-photography follows in this long-standing geographic tradition of recording and analysing visual images.

In particular, auto-photography “allows researchers to capture and articulate the ways identity guides human action and thought. It can generate more authentic data because it enables researchers to look at the participants’ world through the participants’ eyes. Auto-photography does this because participants themselves select and record the static images they feel represent them the best. This is a particularly critical issue for those who conduct research on the experiences of marginalized groups. Because auto-photography provides participants a chance to speak for themselves, it helps researchers to avoid exclusive reliance on potentially culturally biased research instruments.” (Noland, 2006)

In other words, auto-photography is one way to challenge the assumptions and generalizations often made by “outsiders”, even if they are researchers with the best intentions!

Lombard studied two informal settlements (colonias populares) in Xalapa: Loma Bonita and Moctezuma.

Xalapa, Veracruz

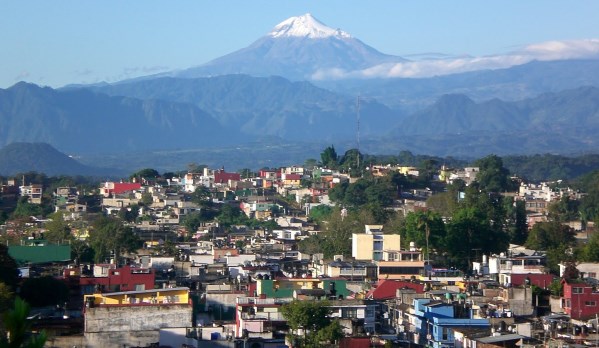
Xalapa, Veracruz (Mexico’s highest peak, Pico de Orizaba, in the background)

What method did she use?

Participants were given a camera and asked to take at least three photos to illustrate each of the following:

  • positive aspects of living in the neighborhood
  • negative aspects of living in the neighborhood
  • residents’ achievements in the neighborhood
  • special/typical characteristics of the neighborhood

Cameras were given to six selected individuals who were given a week to take a series of photos. During a follow-up interview, participants were asked about their motivations for having chosen particular locations to illustrate their neighborhood’s positive and negative aspects.

As Lombard points out, unlike the typically “negative framings” of informal settlements in most discussions, the images taken by the residents “convey a sense of everyday life taking place, amid hope and conviviality, as well as struggle and hardship”. Interestingly, photos of the local schools were taken by 5 of the 6 participants, with one 16-year-old teenager explaining how “in such an isolated neighbourhood, school is a service as significant as water or electricity”. There is a valuable lesson to be learned from the stark contrast between a photo of Loma Bonita school taken by the researcher, in which the school’s building and location are emphasized, and an image of the same school taken by one of the participants, who chose to photograph a group of students, accompanied by a teacher, engaged in a cultural activity in the playground.

Photos illustrating positive aspects of the neighborhood including a resident working a small plot of land for corn (maize) and one of a family butchering a pig. Such images underline the importance, as Lombard points out, of “understanding poverty from the point of view of the poor”, suggesting that residents view their neighborhoods not only as sites of hardship and discrimination, but also as “an important base for livelihoods”.

There are several financial and ethical considerations that also need to be considered. For example, should a financial reward be offered to participants? Might the offer of a financial reward change the level of commitment of participants and affect their choice of subject matter? In the context of Lombard’s study, she opted to give a copy of all photos to each participant, as well as giving them the opportunity to keep the camera that had been provided.

Lombard’s article is a valuable addition to the literature about qualitative fieldwork methods, though (as she takes pains to point out) the method does present “a set of specific ethical challenges” and the results of such studies may be difficult to interpret.

References:

Lombard, Melanie. 2013. Using auto-photography to understand place: reflections from research in urban informal settlements in Mexico. Area (RGS/IBG) 45:1, 23-32.

Noland, Carey M. 2006. Auto-Photography as Research Practice: Identity and Self-Esteem Research Journal of Research Practice, Volume 2, Issue 1.

Related posts:

Rocks and relief fieldtrip: Tequisquiapan and the Peña de Bernal

 Other, Teaching ideas  Comments Off on Rocks and relief fieldtrip: Tequisquiapan and the Peña de Bernal
Jun 212012
 

There is a close connection between geology and relief in many parts of Mexico. In this post we describe a one-day fieldwork excursion in the Tequisquiapan area of the central state of Querétaro that looks at this connection. The fieldwork is suitable for high school students but could easily be extended to provide challenges for college/university students.

The fieldwork starts with a fieldsketch from near Tequisquiapan. Any suitable vantage point will do, provided it offers a clear view northwards to the very distinctive Peña de Bernal (seen in the background of the photo below). At this point, a simple line sketch should suffice to help students identify the following four different kinds of terrain:

  • flat or gently sloping plain, used for cultivation
  • low hills, with gently sloping sides, which look to be covered in bushes and cacti [scrub vegetation]
  • high mountains, with steeper slopes, also with no obvious signs of cultivation
  • the Peña de Bernal itself, a distinctive monolith with exceptionally steep sides

There is no need to identify any rocks or use any geological terms (students can add appropriate labels later!). Engage the students in a discussion about why there might be four different kinds of relief visible in this area, and how their ideas or hypotheses could be investigated further. Conclude the discussion by explaining that they are now going to look for evidence related to the idea that these four different kinds of relief are connected to significant differences in geology.

View looking north from "Las Cruces" near Tequisquiapan. Photo: Tony Burton; all rights reserved.

View looking north from "Las Cruces" near Tequisquiapan. Photo: Tony Burton; all rights reserved.

The next stop is a small roadside quarry on the flat area. The most accessible quarry many years ago was located a short distance south of Tequisquiapan on the east side of the highway, but any quarry on the flat land will serve to reveal the rocks that form the plain.

Roadside quarry, near Tequisquiapan. Photo: Tony Burton; all rights reserved

Roadside quarry, near Tequisquiapan. Photo: Tony Burton; all rights reserved

[Warning: Ensure that you park off the highway; when examining the rock in the quarry, avoid any overhanging sections, and do not do anything to cause slope instability or collapse].

The rocks in the quarry are in layers (sedimentary) and very distinctive. The individual particles of the rock are rough to the touch and sand-sized, so this is some kind of sandstone.

Some layers are more or less horizontal, but in places successive layers are laid down at a much steeper angle. This is “current bedding” and indicates that the rocks were formed by water, perhaps where a river entered a lake. The individual particles in the rock are not well-rounded, so have not traveled all that far.

Within each major layer, the material shows signs of sorting, with fine material sitting on top of coarse material. In some places, the sandstone contains small pebbles, so this rock is a sandstone conglomerate. Small casts of fossil shells can be seen in places, further suggesting it is a sedimentary rock deposited in a former lake.

A very thin white layer is present (at about head height in the photo). This layer is totally different to the sandstone conglomerate. It is fine material that has been compacted. Given the volcanic history of central Mexico, this is almost certainly a thin layer of volcanic ash that covered older rocks before being covered in turn by the next layer of sediments.

With some guidance, students should be able to work most of this out for themselves! The last stage at this stop is to ask why this rock forms the flat land in the area, rather than the hills. (Answer: softer, weaker, less resistant, easier to erode, etc).

The next stop is to take a look at the rock forming the low hills. The highway between Tequisquiapan and Ezequiel Montes (see map) conveniently cuts through a low ridge at San Agustín. This affords an opportunity to take a close look at the rock forming that ridge. [Warning: Ensure that you find a safe parking spot, and take every precaution, since traffic along this highway can be heavy and very fast-moving]

The rock at San Agustín is darker and much harder than the rock in the quarry. It has clear crystals in it, apparently arranged haphazardly. From its color (grey) and grainsize (fine), it is a rhyolite [a fine grained, acid igneous rock].  It is far more difficult to erode than the sandstone on the plain, so it forms upstanding ridges and low hills in the landscape.

From San Agustín, drive through Ezequiel Montes and on to the town of Bernal, one of Mexico’s “Magic Towns“. The next part is the most physically-challenging part of the excursion since it is necessary to climb at least part-way up the Peña de Bernal! [Warning: this is very steep in places, and climbing beyond the mid-way “chapel” is definitely not recommended]. Examining the rocks of the Peña de Bernal reveals that they are lighter in color than the rhyolite and fine-grained, but with larger crystals (phenocrysts) in some places. This rock must have cooled very slowly (or the phenocrysts would not have had chance to form) and this is an intrusive igneous rock known as microgranite. Eagle-eyed students should also find some other rocks while climbing the Peña de Bernal. In places, it is possible to find good specimens of a very hard, banded metamorphic rock that was formed when heat and/or pressure transformed pre-existing rocks. The banded rock is a gneiss [pronounced “nice”].

The presence of intrusive igneous rocks (formed underground) together with metamorphic rocks strongly suggest that the Peña de Bernal is an example of a volcanic plug. It represents the central part (and all that now remains) of a former volcano, whose sides, presumably composed of ashes and lava, have long since eroded away.

Conclusion:

After students have had chance to work most of this out for themselves, a look at the local geological map should confirm that their deductions are reasonable. As can be seen on the map below, the flat area is indeed an alluvial plain (sandstone), with low rhyolite hills and ridges in places, and higher rhyolite mountains in the background, with the distinctive Peña de Bernal made of igneous and metamorphic rocks at the northern edge of the map.

In this particular part of Mexico, as in many other areas, the link between geology and relief is very strong! Happy exploring!

Sketch map, Geology of the Tequisquiapan area

Sketch map, Geology of the Tequisquiapan area; click to enlarge

Related posts:

The first geography field trip guide in Mexico

 Books and resources, Teaching ideas  Comments Off on The first geography field trip guide in Mexico
Apr 032010
 

Despite the popularity of geography in Mexico’s high schools, students are rarely involved in any geographic fieldwork until they reach university. The major exceptions are those students lucky enough to attend one of the international schools offering courses such as the International Baccalaureate (IB) Diploma Programme. The IB geography syllabus requires all students to have undertaken and written up a report on fieldwork. Most IB fieldwork is hypothesis-based.

It is perhaps not surprising therefore that the number of publications relating to fieldwork in Mexico is very small. There have been a limited number of specialist “field guides” published, relating to geology and geography, and coinciding with international conferences.

To the best of my knowledge, the first fieldwork guide aimed at high school students, teachers and the general public was written following a meeting of teachers in Mexico City in March 1979. Excursiones was designed to be a guide for “teachers, parents and/or organized groups interested in finding pleasant and educational ways of enjoying our environment and encouraging the spiritual elements inherent in making use of the tourist attractions that form part of Mexico’s heritage.”

The book, published by Editorial Limusa in 1983, has 14 general chapters (clothing, food, first aid, etc), followed by 17 destination specific chapters:

  • Cacahuamilpa
  • Taxco
  • Zempoala
  • Tepoztlán
  • Desierto de los Leones
  • Ruta de la Estrella
  • Valle de Bravo
  • Isla de los Aves-Ocotal
  • El Xinantécatl and its lakes
  • Piedras Encimadas
  • Ruta de los Volcanes
  • Africam Safari
  • El Chico
  • Basalt columns
  • Tolantongo
  • El Xitle and El Ajusco
  • Chapingo-Texcoco

We’ll take a closer look at the opportunities offered for fieldwork in some of these locations in future posts.